Some basic file transferring techniques used on ssh connections are introduced here.
A introduction of using ssh connections is here.
Suppose you have ssh connection to some host, in the ssh config:
| |
Now in you client machine, you can ssh office into the host machine’s shell and open a remote terminal.
Of course various operations could be done over a ssh connection, including persistent connection, and using many tools to achieve arbitrary data connection.
You can actually use ssh <destination> <command> <arguments...> from client side to use echo or tee to do file transfer, and even add piped compression-decompression filters.
However, we will need more dedicated and robust tools for file transferring over ssh if it is done on a daily basis. Here are some options.
Using scp or rsync command
scp command is often shipped with the ssh cli tool.
Using scp is just like using your typical UNIX or DOS cp:
| |
In order to express a location on a remote ssh machine, either source or target can be written as:
| |
Using the connection office at the top of this post as example:
| |
you can do:
| |
On a lot of linux distributions, you can use rsync tool instead of ssh if you are synchronizing your workspace.
rsync is especially helpful when you want to:
- preserve modification time
- preserve file permissions like owner and group
- only update modified files (instead of transferring the same file again)
To use rsync to synchronize two directories, use like:
| |
Note the / at the end of source path, omitting it will result in a ~/my_project/my_project/... structure.
File transfer GUI clients, WinSCP as example
There are GUI file management tools supporting SFTP and/or SCP protocol.
If you have a ssh server, it is likely SFTP protocol is allowed.
Using the office ssh connection as an example, you can use the same authentication to setup a SFTP connection and use GUI to manage you files.
On Linux, you can use some free tools:
- FileZilla, which has been a popular FTP tool and supports SFTP
- muCommander, a file manager supporting a lot of virtual filesystems including SFTP
- or GNOME/KDE’s default file managers
FileZilla and muCommander are also available on Windows.
There is also WinSCP, which is popular on Windows. I will use WinSCP as an example to show how to manage the files on the remote office host.
Password Connection
Click NewTab, or just opening a new window, WinSCP will spawn a Login dialogue window.
Click on New Site and it should be like this:
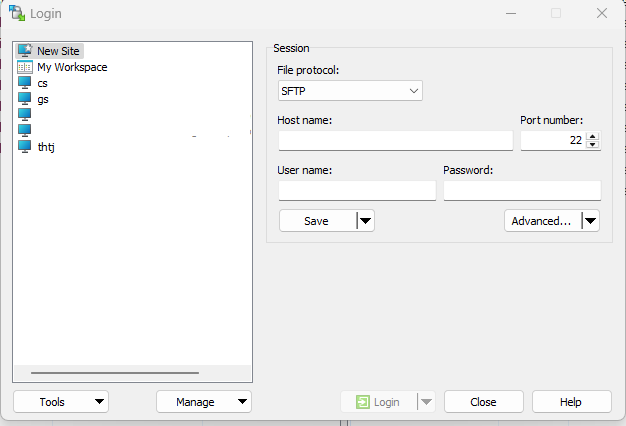
Use the default SFTP protocol. Fill in the Host name, Port number, User Name and Password you use to login office.
Then click save to save the site configuration:
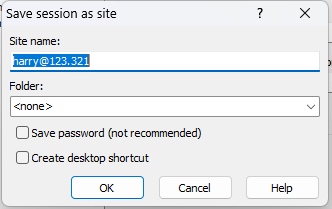
You can name the site to office for clarity.
Then click Login. If configured properly, the connection is established and WinSCP shows a dual-pane layout (if you use the default layout):
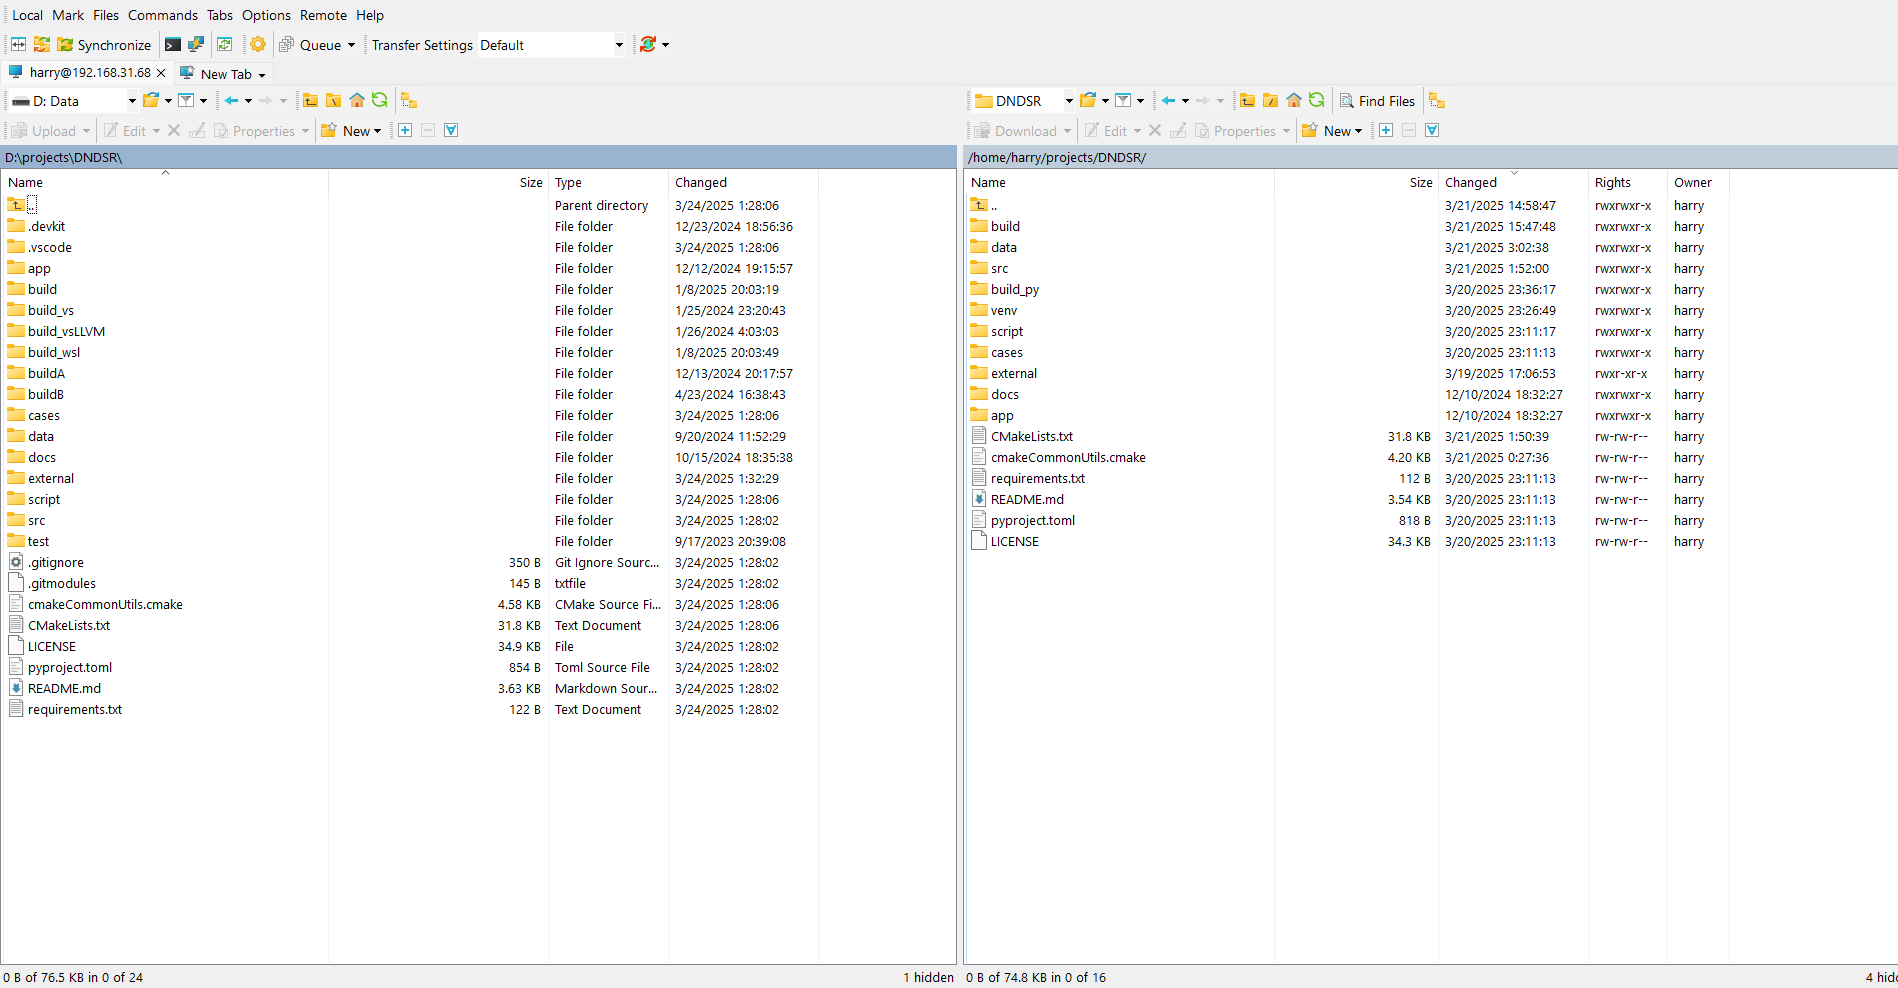
Now, drag-and-drop across local and remote filesystem, or ctrl-c ctrl-v will trigger file transfer.
Key Connection
Recall the key connection part of ssh tutorial, sometimes you are not allowed password authentication.
WinSCP indeed support using key instead of password.
In New Site dialogue click Advanced and select SSH/Authentication tab:
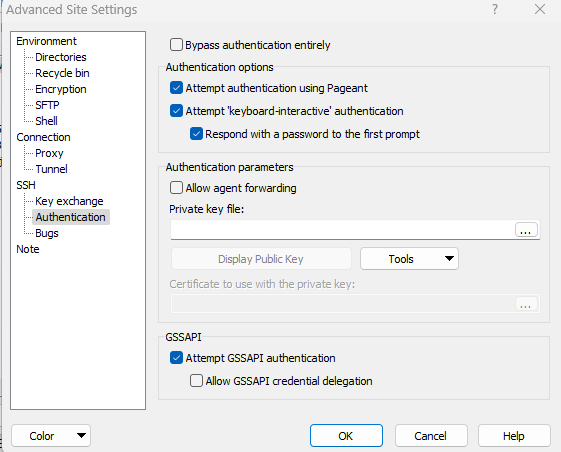
Notice Private Key File field is initially empty. Click the dots at the right, navigate to ~/.ssh (which is usually C:\Users\your_windows_user_name\.ssh), and change the file filter to All Private Key Files:
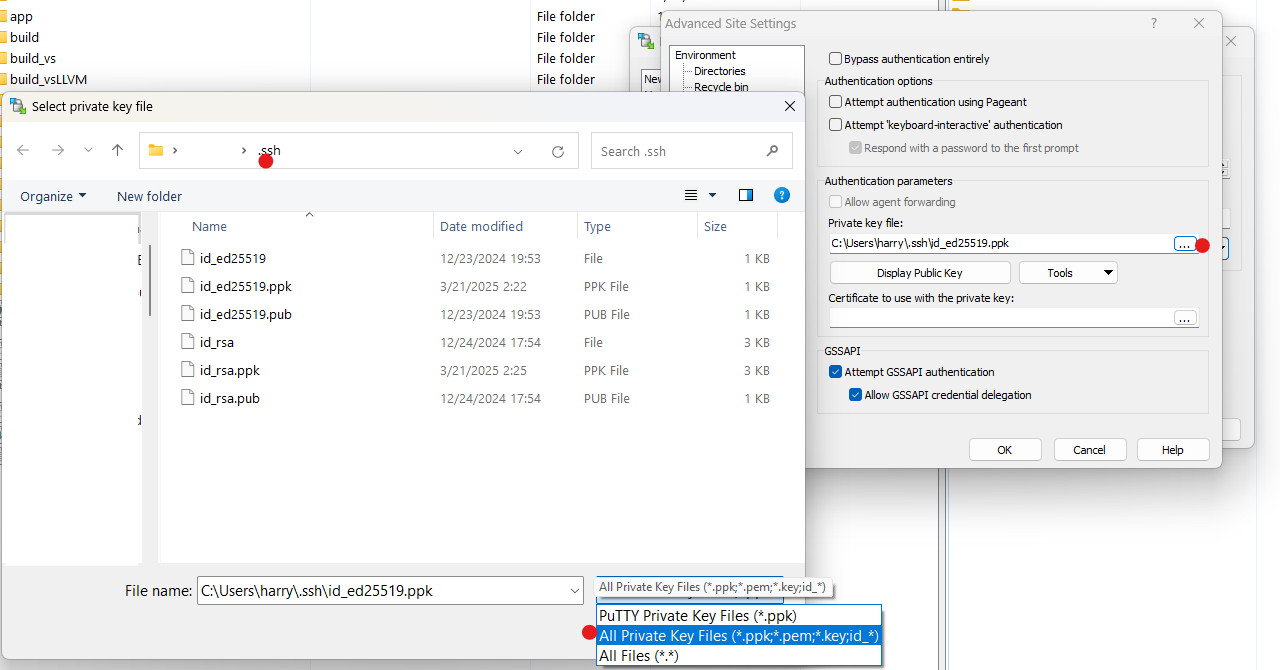
If you generated a OpenSSH ed25519 key pair like in the tutorial, you will only find id_ed25519 and id_ed25519.pub files in it.
Choose the Private Key File: id_ed25519 and follow the prompt to convert it into a putty format key.
Save the generated key file id_ed25519.ppk (maybe in the same location) as WinSCP prompt you and select the generated .ppk file in the Advanced/SSH/Authentication dialogue.
Now, fill in the Host name, Port number, User Name, and leave the Password field empty. Click Login and it should connect.
sshfs mounting
If you prefer to operate in complete commandline, or prefer to use the remote filesystem like a local one, sshfs is the right choice.
Linux sshfs usage
Using sshfs on linux is like mounting the remote filesystem on a local mount point.
Using sshfs on Linux allows you to mount a remote file system over SSH, as if it were a local directory. Here’s a step-by-step guide to get you started:
1. Install sshfs
Make sure sshfs is installed on your system. See sshfs --version.
On most Linux distributions, you can install it using the package manager:
- Ubuntu/Debian:
sudo apt-get install sshfs - Fedora/RHEL:
sudo dnf install sshfs - Arch:
sudo pacman -S sshfs
2. Create a Mount Point
Decide on a directory where the remote file system will be mounted. For example:
| |
3. Mount the Remote File System
Given the connection configuration:
| |
use the following command to mount the remote file system:
| |
Note that different from scp, ~ is not resolved as remote $HOME in the remote path.
Once mounted, you can access the files at ~/remote_mount as if they were part of your local system.
4. Unmount the Remote File System
When you’re done, unmount it using:
| |
5. Notes
rmon the mount point removes remote files! Just like local mount point. So think twice before mounting a remote root/home directory, or mounting on somewhere inside a temporary directory.- You might notice the ownership in the mounted directory is not matching. You can use
-o idmap=userto map all remote files to the user calling the sshfs mount command.
Windows sshfs usage
sshfs uses FUSE under the hood. It is not trivial to use sshfs on windows.
Fortunately, a splendid free solution, SSHFS-Win is present.
The readme of SSHFS-Win is quite clear. I will record some basic moves.
Installation
use winget:
| |
Or manual install:
- WinFSP (msi installer here)
- SSHFS-Win (msi installer here)
Connect
Given the ssh connection config:
| |
In the Windows Explorer, right-click This PC, select Map Network Drive, use a path like
| |
and you will be prompted to enter the password.
You can use key pairs for authentication. Consult this part of SSHFS-Win readme.
Visual Studio Code
Visual Studio Code is able to connect to the remote server. It runs a service on the remote host and communicates with your local code frontend through ssh.
When you open a folder in a remote VSCode session, the file explorer reveals the project file tree.
You can then use either drag-and-drop, ctrl-c-ctrl-v or right-click/download to upload/download files.
Be careful when you have to operate on large files or directories, because VSCode does not reveal the progress of file transfer and the bandwidth might be suboptimal.